Skip to content

Archive for

transforming laminate tables with spray paint

Back when John and I had just started dating, his house was basically a bachelor pad begging for paint…and decor…and furniture. These two little particleboard and laminate tables had been left in the house by the previous tenants (they were probably bedside tables), and John was using them in his office as extra storage. One had an old printer on top, and I think the other one was used to store golf balls. When we revamped the office, we emptied them out and attempted to unload them on Craigslist…which didn’t work. No one wanted these sad tables! So, like the office bookcase we revamped, we decided to hang on to them and give them a spray paint makeover.

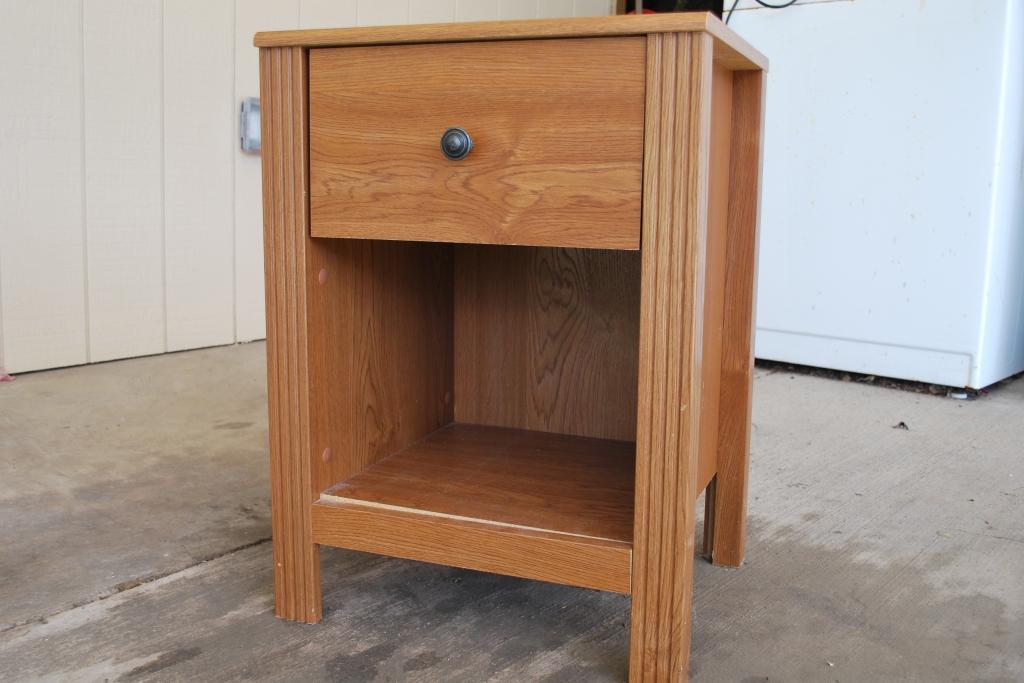
These tables were in worse shape than the photo below would have you know. The tops were covered in drink rings and the laminate was bubbling, there were splinters chipping off the legs, and several spots were just falling apart and needed some serious gluing.

Entryway-Tables_Before-1

This was not only my first time working with laminate, but my first time painting furniture at all (the only other piece we’d done at that point was John’s old coffee table, which we stained a dark espresso). At the time, I had no knowledge of the miracle that is Zinsser BIN primer, and I thought that I’d need to sand off almost all the laminate to get the paint to stick! Ha. Total paint virgin. Had I known what I know today, I would have just given them a quick sanding to rough up the finish and smooth out any nicks, coated them with BIN, and then spray painted (read about another laminate project of mine, properly done with primer, here).

So I worked way too hard with the electric sander, and then picked up a few cans of Rustoleum Universal spray paint in Satin Black (a quick Google search convinced me that it would cover just about anything…in fact, it was this very Google search that introduced me to Young House Love, which has become my DIY bible).

Some wood glue and a couple of coats of spray paint, and I was pretty pleased with myself:

Entry-Tables_During_Compressed

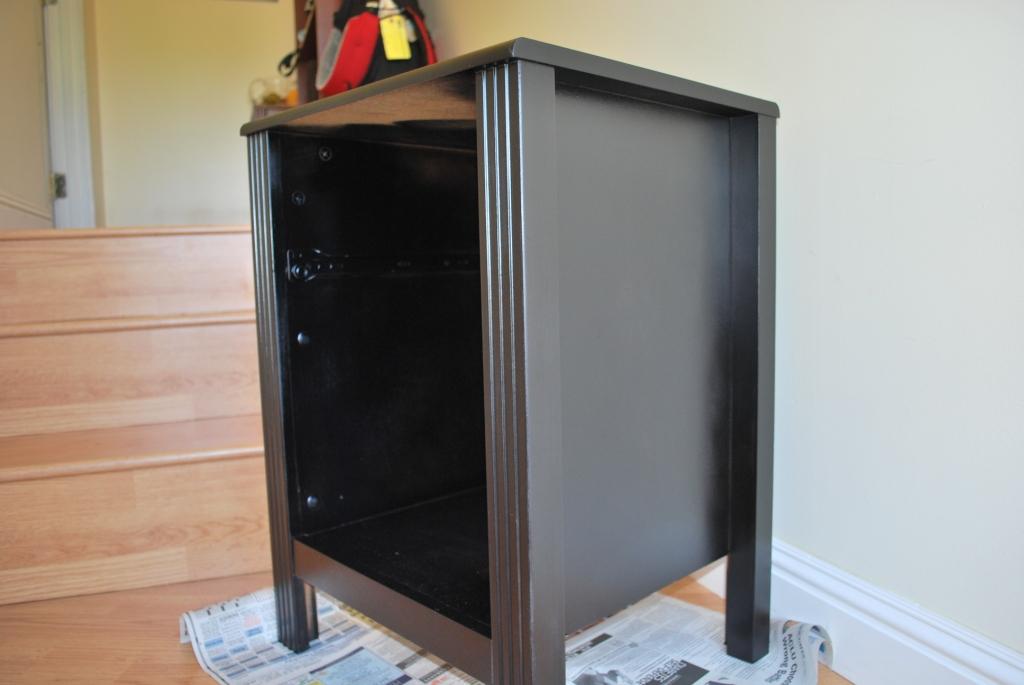
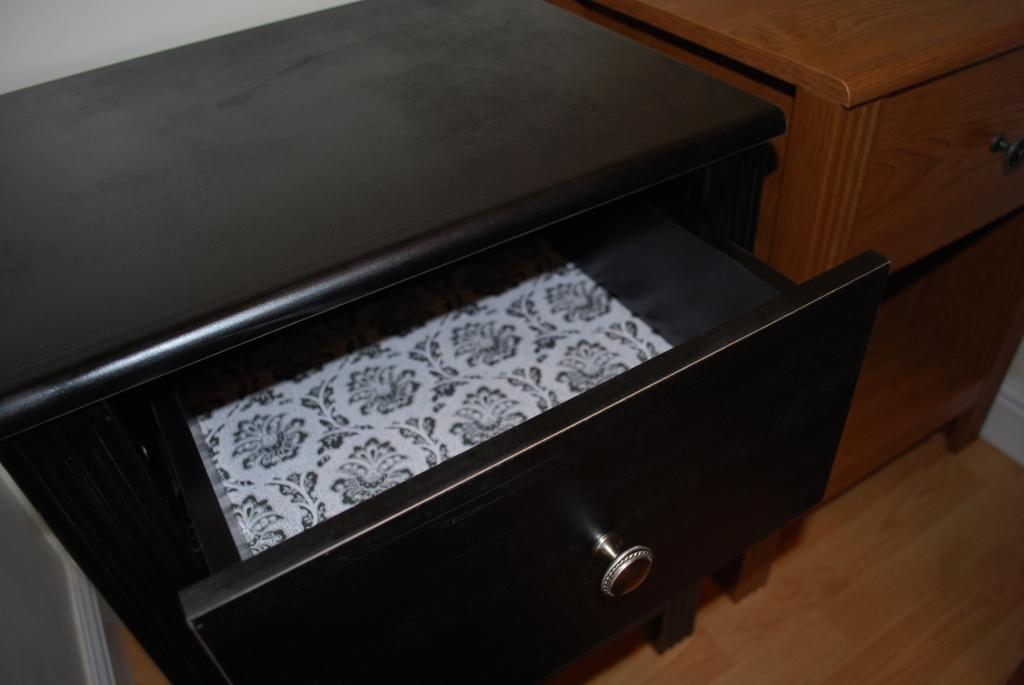
I wanted the tables to look a little more rustic, so I hand-sanded the edges to distress them a bit, then finished them by adding rope-patterned brushed nickel hardware and lining the drawers with pretty scented paper.

Entryway-Tables_After_Drawers

I placed the tables next to each other to create a little entryway console, where we now store our resusable grocery bags, extension cords, flashlights, etc. (The bookcase that we made over sits nearby, on an adjoining wall in our entry hallway). The print above the tables is from Z Gallerie; I wanted something that would cover the generously-sized breaker box eyesore on the wall. And even though we live in Hawaii, we like to honor our Brooklyn roots. :)

Entry-Tables_After_1_Compressed

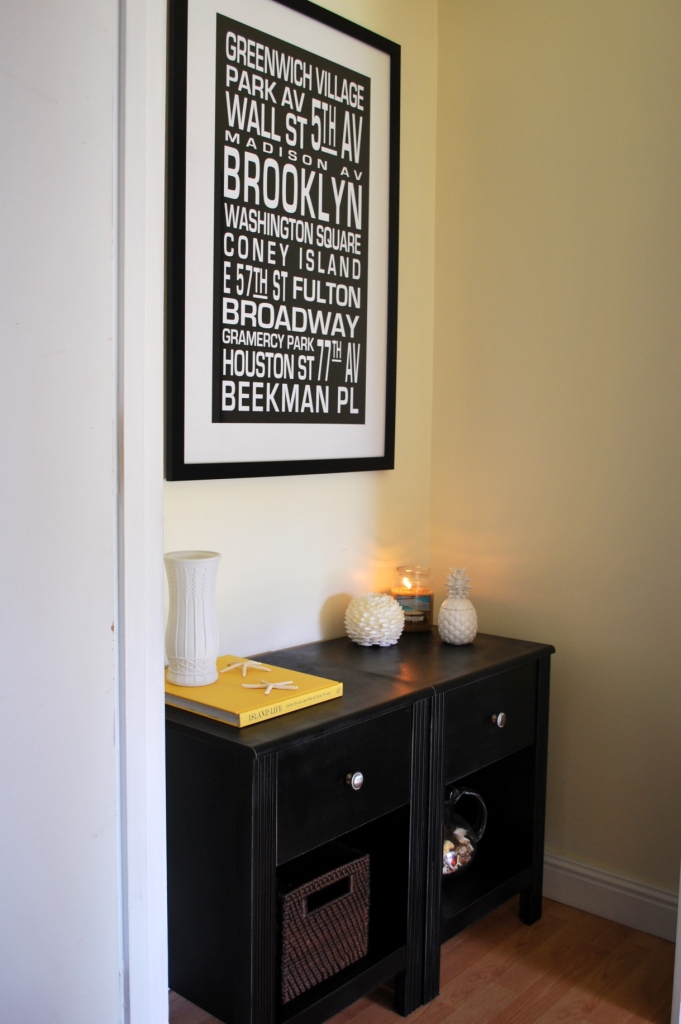
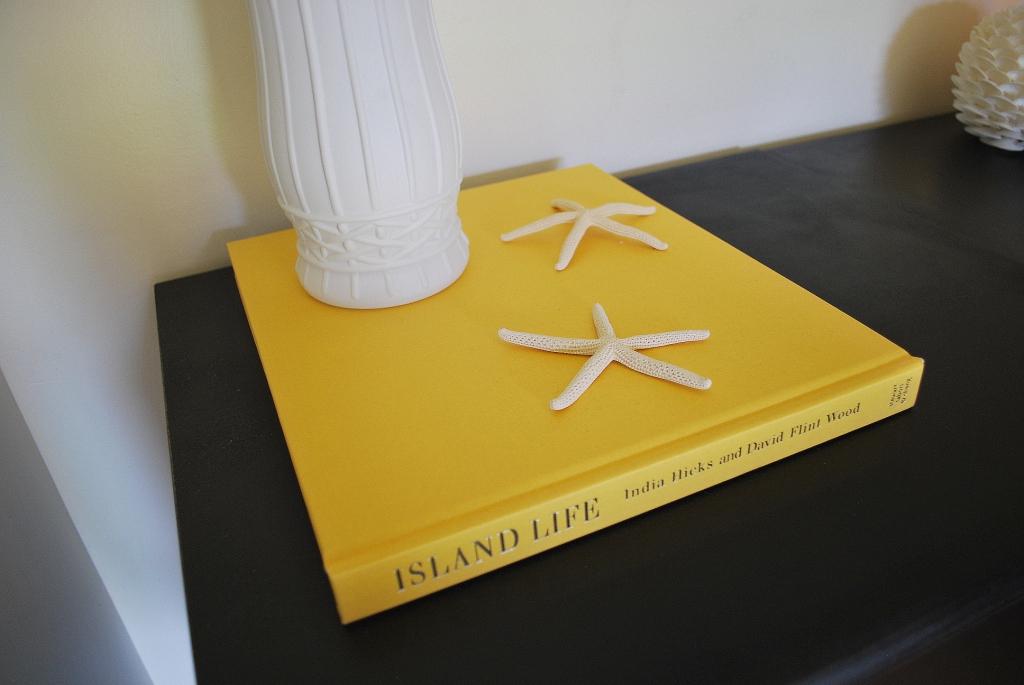
I styled the tables with some beachy accessories, a storage basket, and a cheap-o Goodwill vase that I transformed with flat white spray paint (LOVE doing this! So easy and makes anything look clean and crisp).

Entry-Tables_After_Detail-1_Compressed

The whole project cost us only $28; 3 cans of spray paint for $21, and $7 for the hardware. Everything else we had in the house. I never thought I’d be happy to keep these tables, but you’d never get a hint of their hideous beginnings by looking at them now!

in the kitchen: papaya slaw with lime and mint

I have no idea where the inspiration came from for this papaya slaw. One day I just woke up and decided I wanted some. However, papaya slaw calls for green (aka underripe) papaya, otherwise the pieces will just be a soft mess. Having limited experience with papayas, I dragged John to three grocery stores looking for a display marked “green papayas.” Uhhh…not my smartest moment. I finally realized that THEY’RE ALL GREEN and I should just look for one that’s not ripe

So here are my tips: pick one that’s as green as possible, with no yellow on the skin (it gets yellower as it ripens). It should be firm all over — no soft spots. Use it right away! If you let it sit at home it’ll ripen, and while it’ll be delicious for breakfast, it’ll make a terrible slaw.

The papaya I finally settled on was as big as my face.

Papaya-Face-Compressed

For this slaw recipe, we just used the one mammoth papaya since it yielded a huge bowl of flesh. After removing the skin with a vegetable peeler, we cut it open and assessed what was inside:

Papaya-1_Compressed

Not as underripe as I was expecting, but it would do. While the center was turning orange, all the flesh was still firm and not yet too sweet. If you cut yours open and it’s bright orange, juicy and sweet, it probably won’t make for the best slaw. Just eat it with a spoon and pick another one (green all over, and very firm) for your slaw.

John used a mandoline to julienne the papaya, then we made a dressing with white wine vinegar, Maui onion, lime juice, and papaya seeds. The seeds give the dressing a light peppery flavor…yum. And we love vinegar — we’re coming dangerously close to flat-out drinking salad dressing — so we really loaded ours up. Depending on what you like, you might want to start with less vinegar and adjust as you go.

Papaya-Slaw-2-Compressed

Papaya Slaw with Lime and Mint
Serves 4-6

2 medium papayas, or 1 gigantic papaya
1-2 tbs mint leaves, finely chopped
juice of 2 limes
1/2 c white wine or champagne vinegar
1/2 c sweet onion, chopped (we like Maui onions)
3 tbs papaya seeds
1 tsp honey
1/2 tsp dijon mustard
1/2 tsp crushed red pepper flakes
olive oil
salt

1. Using a vegetable peeler, peel the skin from the papaya. Use a mandoline to cut into julienne strips, or just use a really sharp knife and slice finely, to the size and shape of shoestring potatoes. But if you have a mandoline, that really works best!

2. Reserve the seeds. Clean and dry them, and pick through of any loose papaya flesh. You’ll use 2 tbs for the dressing…as for the others, well, you can plant your own papaya grove. :) We actually have four little baby papaya trees that we planted from seed!

3. Place the onion, vinegar, limes, honey, dijon, red pepper flakes, and 3 tbs of the seeds in a blender. Blend until smooth, streaming in the olive oil. I think I used about 1/4 cup; you want the dressing to be smooth, but not oily. Season to taste with a little salt.

4. Toss the papaya with the dressing and a tablespoon or two of fresh chopped mint leaves. (You may have some extra dressing, which would be delicious on a green salad.) Serve chilled.

in the kitchen: grilled corn salad with chili lime vinaigrette

Fresh local corn is usually in good supply here (Hawaii = corn? Who knew). I started making this salad over a year ago with sweet Kahuku corn from the KCC Farmers’ Market, using a Williams-Sonoma recipe as a starting point and customizing based on what we like and had in the house. Now I’m downright obsessed with it and it’s one of my favorite dishes to bring to gatherings with friends.

Grilling the corn with the husks on gives the kernels a toasty flavor (some of them even came out slightly blackened, yum). The lime vinaigrette is a nice counterpoint to the sweetness of the corn, and chili powder and cayenne add just a touch of heat. When tossed with red onion, tomatoes, feta cheese and fresh herbs, this is a perfect summer salad for weekend barbeques. It also makes a pretty awesome “scoopable” salsa for tortilla chips!

Corn-Salad_1_Compressed

Grilled Corn Salad
Serves 6-8

6 ears of corn, outer husks removed (leave a couple of layers on)
1 c cherry tomatoes, stemmed and quartered
1/2 c red onion, finely diced
1/2 c feta cheese, crumbled
1 tbs fresh thyme or lemon thyme, chopped, woody stems removed
1 tbs fresh basil, stemmed and chopped

chili lime vinaigrette
juice of 4 limes (about 1/2 cup)
1/4 c olive oil
1/4 c red wine vinegar
splash of orange juice
1 tsp chili powder
1 tsp ground cumin
1/2 tsp garlic powder
1/4 tsp cayenne
dash turmeric
salt and pepper

1. Combine the lime juice, olive oil, vinegar, orange juice, and spices in a bowl. Whisk until combined. Season to taste with salt and pepper. Set aside (preferably in the fridge).

Corn-Salad_Limes_Compressed

2. Remove the outer husks from the corn, leaving on a couple of layers. Grill over medium-high heat for 20-30 minutes, until husks are brown and corn is cooked through. Allow to cool.

Corn-Salad_Grilling_Compressed

3. Remove and discard the husks. Use a knife to slice the kernels from the cob. Place corn in a large mixing bowl and break up any kernels that are stuck together.

4. Add the tomatoes, red onion, crumbled feta, thyme and basil. Whisk the dressing and stir in enough to coat. (You may have a little extra dressing…I like to save it for leftovers, since cold salads can soak up lots of the dressing in the fridge.)

5. Season with salt and fresh black pepper. Serve chilled or at room temperature.

Corn-Salad_3_Compressed

Related Posts Plugin for WordPress, Blogger...